YOUR DRIVE, EXPLAINED
Pendulum Run: the complete guide
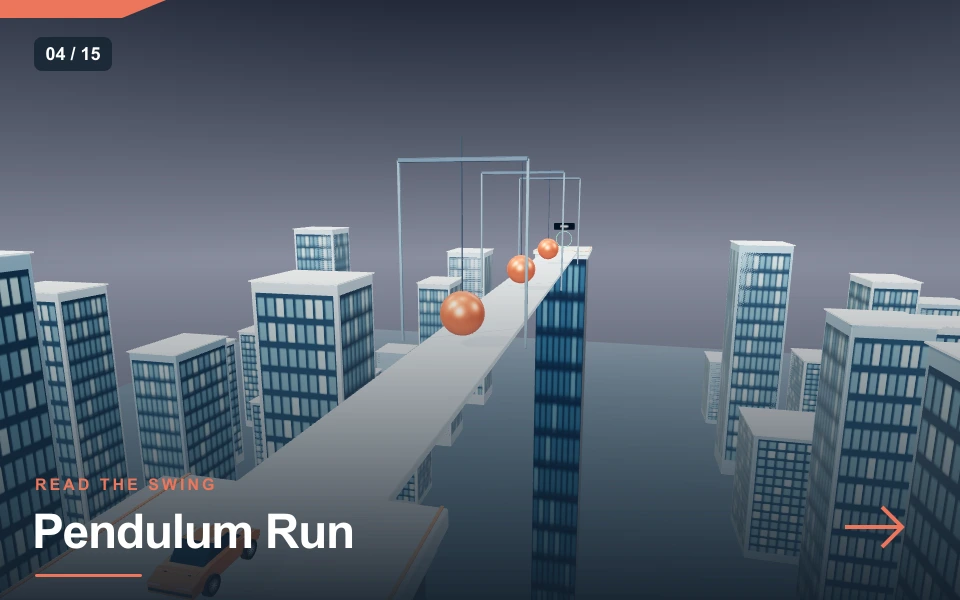
Pendulum Run asks you to cross an eight-metre suspended bridge beneath three swinging wrecking balls. There are no missing-road jumps to charge: the danger moves across a continuous driving surface. Observe each swing, brake before entering its path and accelerate through a useful opening. The balls are collision bodies, so arriving at the wrong moment can physically knock the car off the bridge.
| At a glance | Game details |
|---|---|
| Objective | Pass three swinging wrecking balls and reach the far end of the suspended bridge. |
| Distinct mechanic | Observation + timing |
| Session limit | 120 seconds |
| Control style | pendulum |
Controls & how to play
| Input | Action |
|---|---|
| W / ↑ | Accelerate |
| S / ↓ | Brake; keep holding to reverse |
| A / D | Steer |
| R / Recovery | Reset to the recovery point without spending a life or adding a time penalty |
| P / Pause | Pause or resume the active session |
Choose Low, Medium or High in the player. Low starts with calmer settings; High uses the base challenge described below. Changing difficulty starts a fresh run. Start and focus the canvas for keyboard controls; touch actions appear beneath it. You have three lives. A detected failure offers Continue, and Reset vehicle restores a safe position.
Three gates made from moving hazards
The car begins on a wider roof before a straight elevated bridge. Three wrecking balls swing sideways across that route, spaced along the crossing. Each has a separate phase, so clearing the first does not promise that the second is also clear. The far end leads to another roof with a finish marker.
The SWINGS CLEARED display counts how many hazard positions the car has passed. Passing all three is helpful, but the finish still requires reaching the far end while supported. You have 120 seconds and three lives. The bridge is broad enough for some lateral positioning, but it has real outer edges and no automatic guard against falling. Your primary tools are the accelerator, brake and steering. Space does not provide the tower jump or a temporary invulnerability shield in this game.
Watch position and direction together
A ball near one side of the bridge can look harmless until it starts travelling back toward the centre. Read the direction of the swing as well as its current position. The path is fastest through the lower central part and slower near its high outer positions. A useful opening has enough duration for the whole car to cross, including its rear wheels.
Stop short of the ball’s lane when you are uncertain. Watch it pass, move away and approach the next reversal. Then choose when to accelerate so the car arrives during the open part of the cycle. Do not wait directly beneath the hanging assembly, where a stationary car can still be hit. The rope and support structure help you locate the hazard, but the visible ball and the bridge edges are the important collision references. The scenery below does not provide a safe alternative route.
Build speed before crossing, then prepare again
Accelerating only when the ball reaches its farthest point can leave too little time to move a stopped car through the danger zone. Consider the car’s approach distance and acceleration. Start from a safe position with enough space to develop movement, then arrive as the opening becomes useful. If the timing is wrong, brake before committing to the ball’s path.
After clearing one hazard, use the space before the next as a new preparation area. The phases differ, so blindly carrying your first timing into the second can create a collision. Lift and brake if necessary, observe the next swing and set another departure time. A smooth crossing can involve several pauses and still finish comfortably inside the countdown. Speed is valuable when it matches an opening, but holding the accelerator continuously is not a reliable substitute for reading three separate moving obstacles.
Collisions change position rather than just subtracting points
The wrecking balls have physical collision shapes. Their motion can push the chassis sideways, disturb its heading and remove wheel support. A glancing contact may be survivable if the car stays above the bridge. A stronger impact can carry it over an edge. The game therefore does not treat every collision as an identical fixed score deduction.
Following a contact, release the accelerator and inspect the current heading before trying to steer back. If the car is already falling, ground steering will not rescue it. A fall well below the bridge uses a life and returns the car to the starting recovery point. This mode does not award a new rooftop checkpoint after each wrecking ball. The progress display reflects your current passage along the bridge, so a recovery can put those cleared positions ahead of you again.
What the timer and recovery allow
The two-minute session provides room to watch several cycles, but repeated falls still consume useful time. Three exhausted lives or the time limit end the attempt. The R shortcut or Reset vehicle returns you to your latest cleared checkpoint without spending a life or adding a time penalty. Use it when the chassis is stuck or its orientation is impractical, then plan the crossing again.
The final roof is beyond the third ball. Keep driving toward its marker after the hazard counter reaches three, and remain supported near the far end. There is no final parking-angle test or requirement to strike a ball. The intended result is a controlled crossing. Restart clears the active attempt and resets the hazard phases with the mission time. That repeatable opening is useful for learning an initial departure rhythm. Personal bests stay in local browser storage; the page does not offer competitive matchmaking or a globally verified speedrun ranking.
A pendulum-inspired course, with deliberate simplifications
OpenStax describes a pendulum as an oscillating system driven by gravity and restoring motion. This course borrows the visible swing and its useful timing cues. Its hazard cycle is prescribed by the game, however: the balls are moving collision bodies, not rope simulations whose rhythm changes when your car strikes them.
That choice gives each attempt a learnable pattern. Colliding with a ball affects the car but does not stop the ball’s scheduled motion. The supports and ropes are visual structures around that mechanic. The route is not an engineering model of a construction site, and the vehicle has no realistic damage or repair system. Distinguish these limits from the genuine interaction that remains: the ball’s position, its movement at contact, the car’s momentum and the possibility of losing the bridge. Those are enough to make waiting and commitment meaningfully different decisions.
Practise one passage instead of guessing three
On a first attempt, stop before the first swing and watch a full cycle. Choose a visual cue, such as the ball moving away from the centre, and test one controlled departure. If you are hit, adjust the departure time rather than changing speed and steering at once. The repeated opening lets you compare that change.
When the first passage feels predictable, use the next stretch to observe the second independently. Count successful clean passages in your own notes instead of judging every attempt by whether it finished. That helps isolate which hazard needs practice. Once all three are understandable, connect them with fewer unnecessary stops. Kinetic Crossing also rewards anticipation, but its target moves beneath an airborne car. Skywire Drive removes the moving hazard and narrows the road itself. Pendulum Run stays focused on reading a moving danger while retaining a continuous surface under the wheels.
Graphics, sound and fullscreen settings
Reflective orange wrecking balls, visible ropes and support frames identify the three hazard paths above a pale bridge. The physical ball follows the visible swing, while the rope is decorative. Shadows help read its relation to the surface, but the ball position and bridge edges remain the primary references.
Sound begins after a player interaction. The shared audio system provides a synthesised engine layer, short action cues and background music. Music can be switched off separately, and volume or mute controls adjust the output. Use fullscreen for a larger view; where native fullscreen is unavailable, the expanded player keeps the scene usable. High HD increases rendering resolution and shadow detail on supported devices. Light reduces those costs on a slower phone without changing the objective. Pause before changing focus; the game also pauses when you leave the tab. Choose the setting that keeps your controls responsive rather than assuming the highest option improves the physics.
Pros & cons
What works well
- Swinging collision bodies can genuinely move the car off line.
- Three phases create separate timing decisions.
- A continuous bridge makes braking and waiting central actions.
Practical limits
- A fall returns you to the start rather than the last hazard.
- The hazard cycle is prescribed, with decorative ropes.
- A cleared counter still requires reaching the final roof.
Choose your next challenge
The shared player makes it easy to switch games, but each mission asks for a different decision. Compare the objective rather than expecting one score to mean the same thing across every mode.
| Game | Objective | Session |
|---|---|---|
| Pendulum Run | Pass three swinging wrecking balls and reach the far end of the suspended bridge. | 120 sec limit |
| Kinetic Crossing | Time four jumps onto platforms that slide sideways over the city. | 150 sec limit |
| Skywire Drive | Cross a three-metre ribbon road forty floors above the city, then stop on the final roof. | 180 sec limit |
Frequently asked questions
Do I need to jump over the wrecking balls?+
No. This mode uses the normal accelerator, brake and steering on a continuous bridge. Watch the swing and pass during an opening. The charged jump belongs to Rooftop Leap and Kinetic Crossing.
Does every impact immediately end the attempt?+
No. Collision physically changes the car’s movement. A light contact can be survivable if support remains. Falling far below the bridge consumes a life; exhausting the lives or timer ends the attempt.
Why did the cleared counter go backward after recovery?+
The display counts hazard positions you have passed on the current crossing. Falling returns you to the starting recovery point, so those hazards are ahead again. It is not permanent stage unlock progress.
Can I change a ball’s swing by hitting it?+
No. The collision affects your vehicle, but the ball follows a prescribed cycle. Its rope is a visual element rather than a deformable rope simulation. Learn its rhythm and choose your arrival time.
Final words
Pendulum Run rewards a measured attempt and a clear understanding of the current mission. Start with Low, practise one section at a time and use the reset control when you need a safe position. Watch what changed between attempts before adding more speed. The useful result is a technique you can repeat, with room to improve on the next run.