YOUR DRIVE, EXPLAINED
Rooftop Leap: the complete guide
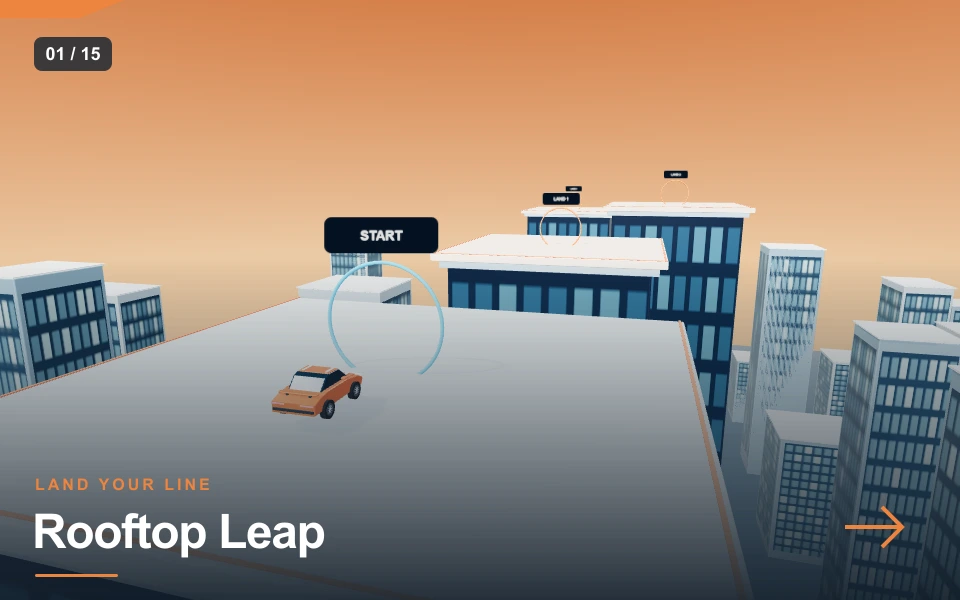
Rooftop Leap turns a sports car into a deliberate jumping challenge above a city skyline. Charge on a solid roof, build forward momentum, release before the edge and land on the next building. Three roofs must be reached in order; passing a marker in midair does not count. The second landing is higher and the later roofs sit sideways from your starting line, so the same launch cannot solve every gap.
| At a glance | Game details |
|---|---|
| Objective | Charge a jump and land on three different skyscraper roofs. |
| Distinct mechanic | Jump power + landing |
| Session limit | 150 seconds |
| Control style | tower |
Controls & how to play
| Input | Action |
|---|---|
| W / ↑ | Accelerate |
| S / ↓ | Brake; keep holding to reverse |
| A / D | Steer |
| Hold / release Space | Charge a grounded jump, then release to launch |
| R / Recovery | Reset to the recovery point without spending a life or adding a time penalty |
| P / Pause | Pause or resume the active session |
Choose Low, Medium or High in the player. Low starts with calmer settings; High uses the base challenge described below. Changing difficulty starts a fresh run. Start and focus the canvas for keyboard controls; touch actions appear beneath it. You have three lives. A detected failure offers Continue, and Reset vehicle restores a safe position.
What actually completes the mission
The opening roof is a preparation area rather than a completed target. Your first destination is the roof straight ahead. After that, the next building sits to the right and slightly higher; the final one is back toward the left. The roofs are substantial physical surfaces with empty space between them. Driving off an edge without enough lift sends the car downward.
Progress changes when the suspension wheels contact the next required roof. Flying over its centre or brushing a building’s side does not satisfy that check. Read the ROOFS display after landing before preparing another attempt. A successful landing becomes your recovery point, which lets you practise the next gap without repeatedly solving the first. The 150-second clock continues through recoveries. Completing all three target landings ends the run, and the remaining time contributes to the result.
Separate forward speed from jump power
Space charges a jump while the car is grounded. Releasing it supplies the upward launch. The accelerator supplies forward movement, so a fully charged jump from a stationary car rises mostly above the same roof. Conversely, high road speed without a released jump carries the car over the edge with very little vertical clearance.
Use the JUMP POWER display to learn the distinction. First charge while stopped and release once: the car should rise and come back down. Then restart and combine charging with a measured approach. The opening roof provides room behind the initial car position if you need a longer run-up. A high charge gives more time above the gap, but an earlier release can spend that time over your starting building. Judge the launch point and horizontal momentum together. The visible height is an altitude reading, not a bonus for climbing as high as possible.
A repeatable opening jump
For the straight first gap, keep the steering centred while you prepare. Hold the jump button and accelerate together, watch the charge rise, and release while wheels still have support on the roof. The full charge takes a little over a second, so a quick tap produces a very different arc. Keep looking at the destination surface rather than the decorative skyline.
When you arrive, release the accelerator and use the brake to settle instead of immediately driving through the far edge. The landing message and progress counter confirm whether that building counted. If the car hits the near face, you needed more clearance, a later launch with support still underneath, or more approach speed. If it sails beyond the roof, shorten the run-up or use less charge. Change one of these inputs per retry; changing everything makes the failure hard to diagnose.
Why the second and third roofs need new lines
The second roof is offset from the first and sits four world metres higher. A launch that comfortably reaches an equal-height surface can strike a raised surface before it reaches the top. Leave a margin above the near lip rather than aiming directly at it. Turn into your intended line while still on the current roof, then straighten the steering before the final approach.
The last roof changes the lateral direction again. Plan where you want the car to land and work backward to an approach heading. Reverse slowly if you need preparation space, then stop before switching back to acceleration. Steering wheels act through ground contact; they do not provide an airborne sideways teleport. A large correction after takeoff therefore cannot replace a properly aligned launch. The useful skill is setting direction before release and using the available roof width as a runway.
Recoveries, limits and fair retries
There are three lives. Falling far below the rooftop route consumes one and returns the car to its latest completed roof. The running clock makes repeated unsuccessful jumps costly even when the landing checkpoint is close. Three exhausted lives or the time limit end the attempt. A full restart returns the mission to the opening roof and clears its current progress.
The R shortcut or Reset vehicle returns the car to its checkpoint without spending a life or adding a time penalty. It can help if you have stopped in an awkward orientation, but it does not credit an unlanded roof or restore the clock. After recovery, check the direction of the next target before accelerating. Avoid treating the checkpoint as an automatic launch setup: it is a safe place to prepare. Your stored personal best belongs to this browser. It is not a shared online leaderboard or evidence that somebody else completed an identical run.
What the physics explains, and what it simplifies
Projectile-motion background helps explain why forward movement and vertical launch can be considered separately. More upward speed generally creates a longer flight, while horizontal speed helps cover the gap during that flight. OpenStax discusses this relationship for ideal projectiles; this game adds suspension, body collisions and damping, so textbook equations are a planning aid rather than an exact landing calculator.
The game also simplifies the vehicle substantially. There are no gears to shift, tyres to purchase or aerodynamic tuning menu. The jump is an intentional arcade action rather than a capability of an ordinary road car. The approximate forty-floor height describes the environment, not a measured real building or a real-world stunt recommendation. What matters in play is the visible surface, the current charge, your heading and the contact that registers the landing.
A focused ten-minute practice session
Use the first attempt to test a grounded charge without travelling toward an edge. On the second, complete just the straight first gap and stop. On the third, explore the first destination roof slowly and identify where to begin the angled approach. You can pause once landed to look at the route without spending more mission time.
Record three simple observations: charge at release, direction of the car and where the landing occurred. A near-edge landing is a different problem from an overshoot even when neither attempt completes the entire course. Once the first gap is repeatable, use the checkpoint to practise the raised second roof. Skywire Drive is a useful follow-up for controlled ground steering; Kinetic Crossing adds targets that move during flight. Neither uses the same three fixed landings, and their scores should not be compared as if they measured the same task.
Graphics, sound and fullscreen settings
Glass-faced towers, contrasting roof surfaces and orange edge strips make the fixed launch and landing areas readable. The car has a sculpted body, reflective paint, visible wheels and a following camera. The skyline below is decorative; the roof surfaces and their suspension contacts define the playable route.
Sound begins after a player interaction. The shared audio system provides a synthesised engine layer, short action cues and background music. Music can be switched off separately, and volume or mute controls adjust the output. Use fullscreen for a larger view; where native fullscreen is unavailable, the expanded player keeps the scene usable. High HD increases rendering resolution and shadow detail on supported devices. Light reduces those costs on a slower phone without changing the objective. Pause before changing focus; the game also pauses when you leave the tab. Choose the setting that keeps your controls responsive rather than assuming the highest option improves the physics.
Pros & cons
What works well
- Three ordered roof landings require real flight and contact, rather than distance alone.
- Raised and sideways targets demand different approach lines.
- Landing checkpoints make later gaps practical to practise.
Practical limits
- Ground steering offers limited correction after takeoff.
- A high charge can overshoot a small target.
- Recovery keeps the mission clock running.
Choose your next challenge
The shared player makes it easy to switch games, but each mission asks for a different decision. Compare the objective rather than expecting one score to mean the same thing across every mode.
| Game | Objective | Session |
|---|---|---|
| Rooftop Leap | Charge a jump and land on three different skyscraper roofs. | 150 sec limit |
| Kinetic Crossing | Time four jumps onto platforms that slide sideways over the city. | 150 sec limit |
| Skywire Drive | Cross a three-metre ribbon road forty floors above the city, then stop on the final roof. | 180 sec limit |
Frequently asked questions
Why did flying through a marker not count?+
A completed roof needs wheel contact with the next required physical surface. An airborne pass through the decorative marker is insufficient, and reaching a later roof before its predecessor does not skip the order.
Can I jump while already falling?+
Charging and releasing require grounded support. Once the car has left the roof without a launch, holding the jump button cannot create another midair jump. Recover or let the fall return you to the last completed roof.
Does more power always produce a better jump?+
No. More upward speed changes flight time, while approach speed and heading determine where you travel. A powerful stationary jump goes upward; a powerful fast launch can carry beyond the destination. Match the arc to the current gap.
How does this differ from Kinetic Crossing?+
These roofs are fixed, with one higher landing and changing lateral offsets. Kinetic Crossing uses four sliding platforms, so their position at landing time also matters. Both have charged jumps, but they ask for different preparation.
Final words
Rooftop Leap rewards a measured attempt and a clear understanding of the current mission. Start with Low, practise one section at a time and use the reset control when you need a safe position. Watch what changed between attempts before adding more speed. The useful result is a technique you can repeat, with room to improve on the next run.