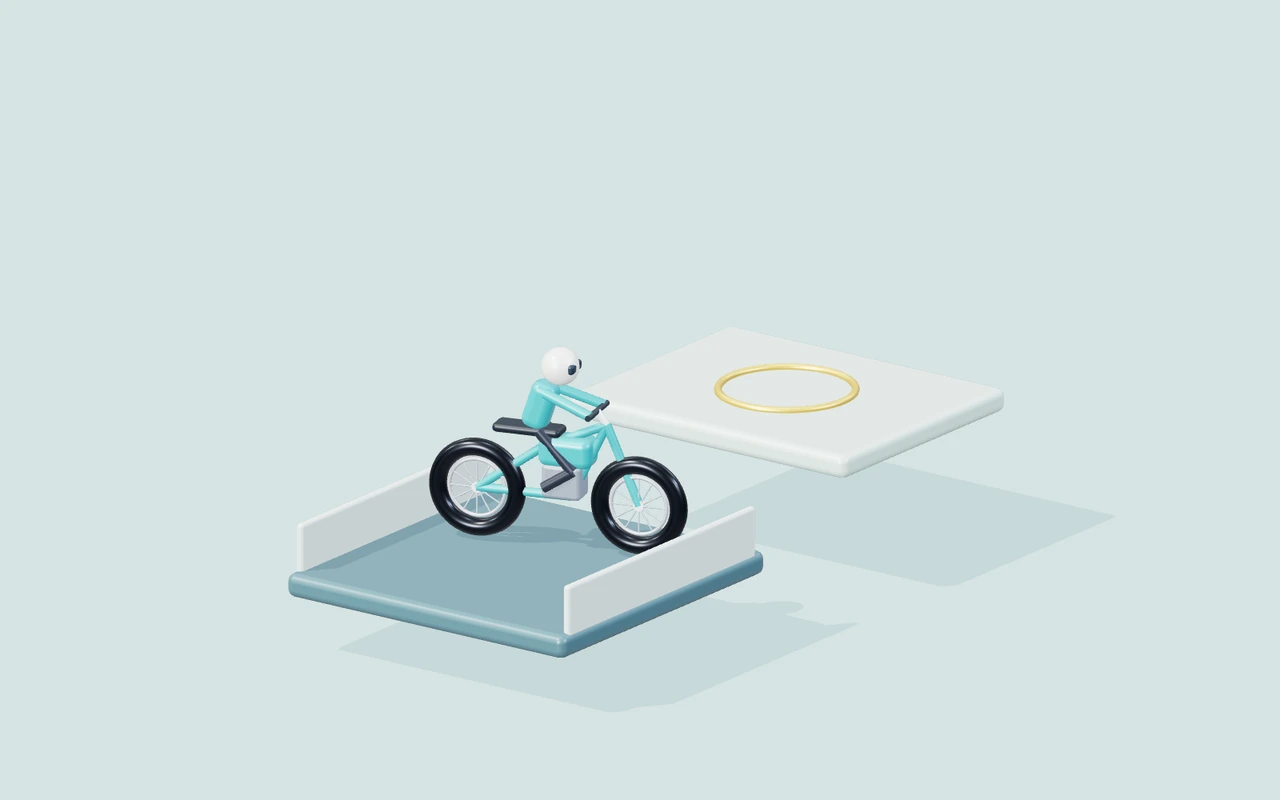
Bike Trials separates its course into six rooftop pads and five crossing decisions. That structure makes it tempting to find one hop and repeat it, but the pads first rise and then descend. Each arrival changes the room available for the next departure. The slower rear-wheel motor gives you time to make those differences readable. This guide focuses on the grounded setup: build useful movement before the lip, hop while support exists and settle on the destination before repeating the action. The game is a side-view 3D balance challenge, so the task is not steering around obstacles or choosing gears. It is making each separate surface a usable starting place for the next crossing.
Begin inside the pad: Preparation needs supported room
A bike parked at the very edge has little space left to build movement and choose a supported hop. Prepare slightly inside the pad so you can see throttle, departure and the next lip as separate parts of the attempt. The slower Trials motor is useful for this measured setup.
Read the next target height before accelerating. A higher lip asks the wheels to clear its face, while a lower pad offers a different arrival relationship. Use the visible roof surface and HOP marker as references rather than an imagined exact universal timing. The marker helps locate a departure area; it does not guarantee that every speed or chassis angle will produce the same result. A helpful preparation leaves you able to describe where support existed when you pressed, how the bike approached and what surface you intended to meet. That description makes a later correction purposeful instead of a more hurried repeat.
Combine movement with the hop: Height alone does not cross the gap
A stationary hop can raise the bike without carrying it across an opening. At the other extreme, an approach that reaches the edge before the button press can remove support before the launch condition is met. The useful setup connects manageable forward movement with a grounded hop.
Press while the wheels still have support, then release after the launch. There is a cooldown, so repeated rapid taps do not create an unlimited series of midair boosts. Holding may also trigger another hop when support and cooldown return, making a small landing harder to read. Keep the next launch deliberate. If the bike falls short, inspect approach and support before changing every lean input. If it reaches the far lip but hits its face, study the arriving wheel path and departure preparation. Those visible results tell you more than a general instruction to jump harder or keep every action held.
Read rising and falling targets separately: One hop is not the whole route
The earlier pads climb and the later ones descend. A rising target needs enough flight for both wheels to meet the top rather than an initial front-wheel touch against its face. A descending target can allow more falling motion before support returns, changing the landing angle and available stopping room.
Keep a successful first crossing as a baseline, then inspect the next target as a new question. Change one preparation detail when the destination gives it a reason. Lean modifies pitch; it does not create free steering or a replacement landing surface. A small correction can make an arrival easier to read, while a long hold can create a rear-heavy or nose-down touchdown. Use the chassis against the visible roof as your reference. The route’s interest comes from those changing relationships, even though the buttons stay consistent. The same controls can support several distinct decisions without requiring an identical timing at every gap.
Settle the checkpoint: Arrival should support the next departure
Passing a pad’s horizontal coordinate while falling does not secure a safe recovery point. The bike needs supported movement on that pad. After touchdown, watch the wheels, balance and remaining roof space before assuming the next checkpoint and launch are ready.
Brake or use a small correction if the arrival still carries awkward motion. Release the previous hop so the next departure is intentional. Continue and vehicle recovery place the bike inside its supported checkpoint, giving later gaps a useful practice start. They do not make an unsupported near pass into a completed landing. The final pad follows the same principle: the finish needs upright, grounded arrival at its distance, without a separate parking hold. Let the supported result become clear, then carry the remaining route. A sequence of settled pads makes the course understandable and leaves fewer moments where a promising flight ends in a rushed edge rescue.
A hop rises but does not reach the next roof
You stop near a HOP marker and press from an almost stationary bike. The upward movement is obvious, but the rear wheel does not travel far enough across the gap to settle on the destination. Prepare from inside the supported pad and add a manageable forward approach before the hop. Keep the jump action deliberate, then compare the arriving wheel path with the earlier stationary attempt.
Watch whether the extra approach provides useful horizontal movement while launch support remains. More visible height is not the only question; the bike needs a flight that can meet the next supported surface. Keep the approach that leaves a readable crossing, then adjust a small departure detail if needed. Do not add several lean changes at once, because they obscure whether the missing movement has actually improved.
The wheels leave before the intended launch
You accelerate toward the lip while judging the next roof. By the time you press hop, support has disappeared and the bike is descending, so another held press does not create a fresh airborne jump. Move the preparation earlier and choose the grounded launch before the edge. Read wheel support as the condition for the action, with the marker as a useful location reference rather than a reason to wait until the last moment.
Compare whether the next attempt produces its upward impulse while supported. That visible departure is the evidence needed before judging whether the resulting distance or angle requires a different adjustment. Preserve supported timing even if the first corrected flight remains imperfect. Investigate approach pace or pitch afterward instead of returning to a late press simply because the original edge looked closer to the destination.
A rising pad catches the front wheel at its face
The front wheel reaches the higher roof’s near wall but the bike does not settle on its top. The touch appears close to success, yet the rear wheel and chassis have no usable supported landing. Read the entire wheel path and target height before the next attempt. Prepare a supported approach that gives the bike room to clear the lip, and keep lean small enough to observe the actual arriving relationship.
Watch whether both wheels reach surface contact inside the pad rather than merely touching its face. A supported touchdown and stable continuation explain a successful crossing more clearly than one brief contact at the wall. Let that landing settle before preparing another hop. Keep the rising-target lesson, but read the later descending roofs separately because their support height and arrival time change the next decision.
An apparently reached pad does not become the recovery point
You pass above or beside a destination and continue falling. After a detected failure, recovery returns to the previous supported pad, which feels surprising because the horizontal distance had briefly reached the next roof. Treat the previous pad as the current safe start and aim for an actual touchdown on the destination. Observe supported movement after arrival before assuming that the checkpoint is recorded for a later gap.
Read wheel contact and the recovery location together. The system preserves a supported checkpoint, not every coordinate reached during flight, so a near passage can remain incomplete even when the distance display advances momentarily. Once support is secure, release prior inputs and prepare the next departure. A short settled moment can prevent an unnecessary continuing hop from throwing the bike toward another edge before the new starting place becomes usable.
Keep the experiment useful: Controls, recovery and setup
Before trying the exercise, confirm the current mission in Bike Trials: Balance, climb and bunny-hop across rooftop steps to the final platform. The player’s controls table is the reference for the actual actions available. W / GAS means drive the rear wheel. S / BRAKE means brake the rear wheel. A / D means lean backward / forward. Start and focus the canvas before using the keyboard. On a phone, use the labelled touch actions under the scene. Change one input at a time while learning the response; unfamiliar finger placement can otherwise look like an unexplained change in the game’s handling.
Difficulty and Graphics answer different questions. Low creates a calmer learning condition by changing the relevant mission settings; Medium removes some assistance; High uses the base challenge. Changing difficulty begins a fresh run, so choose it before comparing attempts. Graphics changes the rendered scene: Low reduces resolution and disables sunlight shadows, Medium adds shadows, and High increases sharpness, shadow detail and material reflections. A clearer picture can help you read the scene, but it does not replace the movement decision described in this article. Keep difficulty fixed while testing a technique.
Three lives give a run room to continue after detected failure. Read the reason on the Continue panel and choose one correction before recovering. Continue restores a safe position while completed mission objectives remain where the mode supports them. Reset vehicle can recover an awkward position without refreshing the page or spending a life. Recovery does not mean a completely fresh mission: choose Start a new run when you want the original opening. A paused panel stops the active simulation, and a voluntary reset adds no time penalty.
Use the pause control if you need to read, change hand position or look away. Sound and background music have separate controls and begin after an interaction; they are optional feedback rather than prerequisites for understanding the visible target. Fullscreen gives the scene more room, with an expanded-player fallback where the native API is unavailable. If your experiment is about steering or timing, keep the browser, input arrangement and graphics profile consistent. A score from one isolated attempt tells you less than a decision that leaves the vehicle well positioned in several attempts.
Decisions at a glance
| Situation | Useful action | Evidence to watch |
|---|---|---|
| A hop rises but does not reach the next roof | Prepare from inside the supported pad and add a manageable forward approach before the hop. Keep the jump action deliberate, then compare the arriving wheel path with the earlier stationary attempt. | Watch whether the extra approach provides useful horizontal movement while launch support remains. More visible height is not the only question; the bike needs a flight that can meet the next supported surface. |
| The wheels leave before the intended launch | Move the preparation earlier and choose the grounded launch before the edge. Read wheel support as the condition for the action, with the marker as a useful location reference rather than a reason to wait until the last moment. | Compare whether the next attempt produces its upward impulse while supported. That visible departure is the evidence needed before judging whether the resulting distance or angle requires a different adjustment. |
| A rising pad catches the front wheel at its face | Read the entire wheel path and target height before the next attempt. Prepare a supported approach that gives the bike room to clear the lip, and keep lean small enough to observe the actual arriving relationship. | Watch whether both wheels reach surface contact inside the pad rather than merely touching its face. A supported touchdown and stable continuation explain a successful crossing more clearly than one brief contact at the wall. |
| An apparently reached pad does not become the recovery point | Treat the previous pad as the current safe start and aim for an actual touchdown on the destination. Observe supported movement after arrival before assuming that the checkpoint is recorded for a later gap. | Read wheel contact and the recovery location together. The system preserves a supported checkpoint, not every coordinate reached during flight, so a near passage can remain incomplete even when the distance display advances momentarily. |
YOUR NEXT SESSION
Put it into practice
Use the first gap to compare a supported approach with a nearly stationary hop. Keep lean familiar and watch where both wheels meet the destination. Once that crossing is readable, inspect the higher next pad and change only the preparation its lip requires. On the descending section, observe flight and settling separately instead of copying the rising-pad timing automatically. After every arrival, release hop and confirm supported movement before continuing. Use recovery to practise one unresolved gap, then a fresh run to connect all five with usable landings.
Play Bike TrialsFrequently asked questions
Can I use the same timing for every gap?+
The route first climbs and then descends, so destination height and arrival conditions change. Use a successful crossing as a baseline, then inspect the next lip and surface. Preserve useful preparation while changing only the detail that the new target requires.
Why does a held hop sometimes make the landing harder?+
Once support returns and the cooldown permits, continued holding can produce another hop. Release after the intended launch so the next departure is deliberate. A readable touchdown should become a supported starting place before another action sends the bike toward the next gap.
Does touching the pad face secure a checkpoint?+
A brief wall touch or airborne passage is not the same as supported movement on top of the pad. Confirm wheel support and a usable landing. Recovery records safe supported progress, so an incomplete near pass can return you to the previous roof.
Final words
Begin with supported room, combine movement with a grounded hop and judge the whole landing. Rising and falling pads create different arrival questions. A settled checkpoint leaves the next crossing playable and makes recovery a useful practice tool.
Choose one idea from this article, try it in your next run, and notice what changes. A calmer, repeatable attempt gives you something useful to build on.