The nearest traffic car is easy to notice, but it may not be the most useful one to watch. A gap that solves the immediate obstacle can leave the next pair of cars blocking your path just as speed carries you toward them. Velocity Coast becomes more readable when you choose the current pass with an outgoing lane in mind. This guide focuses on looking two gaps ahead, using braking before a crowded group and treating close-pass rewards as optional results of clean movement. The objective remains distance within the run’s timer, with shields protecting opportunities to continue.
Choose the outgoing lane: A pass should create another option
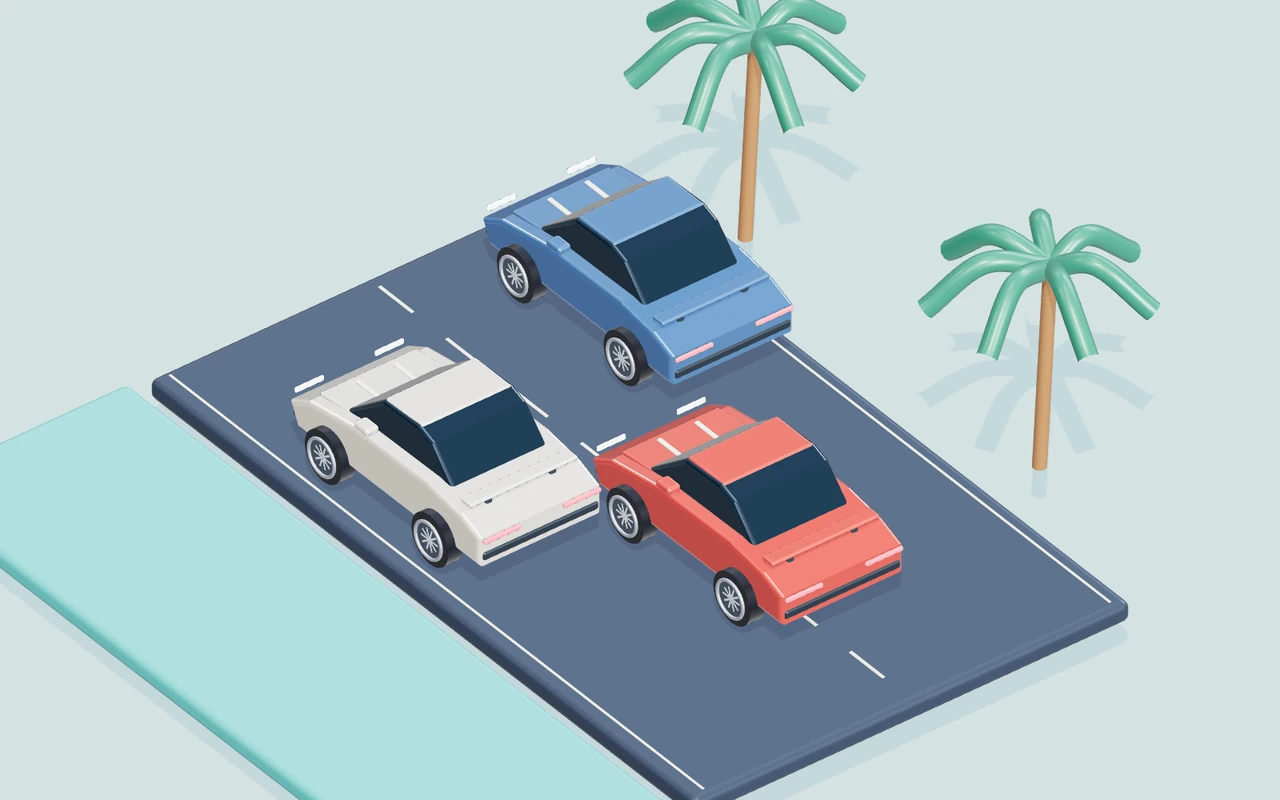
Before moving around the nearest vehicle, look at the traffic beyond it. Identify which lane will still give you space after the first pass. If you steer into an immediate opening without reading the next group, the successful movement can leave you with another urgent correction and less room to make it.
This does not require memorising a traffic schedule. It requires extending your attention beyond the nearest bumper. Compare two nearby gaps and choose the one that leaves a clearer next path. The highway game keeps forward movement as the central task, so a useful line is one you can continue. A slightly less dramatic first pass may preserve more uninterrupted driving than a narrow opening that immediately forces you toward a second vehicle. Read the pair ahead before treating the nearest gap as the whole decision.
Brake before the group: Preserve time to read
A crowded section can feel like a steering problem when its real difficulty is how quickly you arrive. If every car reaches the immediate collision area before you have chosen a lane, larger direction inputs may only exchange one urgent obstacle for another. Reducing speed earlier creates time to compare the openings.
Use the brake before the tight group, then select a clearer path while the traffic remains readable. On touch, automatic acceleration makes steering and available action buttons important to check; the player includes the relevant brake control for the coastal run. Do not assume every other car game has the same touch arrangement. Learn one traffic decision without boost, then add a short burst only when the outgoing road supports it. A calm setup can preserve shields and leave more of the timer available for useful distance.
Treat near misses as optional: Keep the clean pass first
A close-pass reward can tempt you to move nearer a vehicle than the route needs. That changes the objective from selecting a useful gap to gambling on a small visible separation. A collision costs protection and interrupts movement, so a failed attempt at an optional bonus can reduce the opportunity for a longer overall run.
Build a clean pass first. Keep enough room to make the line repeatable, then observe whether the game rewards a naturally close passage. Do not force the bonus while still learning steering response or reading the next traffic pair. The displayed distance and shield state give the broader context. A run that stays manageable through the full countdown is a better starting point than a risky opening whose result depends on one last-second movement between cars. Extra points or distance should support the route, not replace it.
Use boost when the exit stays open: The reserve follows a plan
An open stretch gives a boost a clear job. A crowded group gives it a reason to wait. If you activate a burst simply because reserve is available, traffic can grow quickly in the camera before the line is prepared. A useful boost begins after you have identified both the current lane and the outgoing space.
Try a short burst and release before the next group becomes urgent. Observe whether the resulting path leaves another manageable decision. The reserve recovers when unused, so spending it continuously is not the only way to gain distance. Compare one familiar stretch with and without the burst, keeping the steering plan similar. Use the difference to decide where it actually helps. The goal is more useful uninterrupted driving, not a high speed display that makes every later traffic choice harder to read.
The first opening leads into another blocked lane
You steer past the nearest traffic car successfully, but the chosen lane closes ahead. A second urgent correction begins before the car has settled from the first pass, and the available space feels smaller than expected. On the next approach, read the traffic pair beyond the immediate obstacle. Choose a gap that leaves an outgoing lane, even if the nearest opening appears more convenient. Keep boost out of the comparison.
Watch the room available after the first pass. A useful choice should reduce the urgency of the next decision instead of simply moving the nearest obstacle behind the camera. Preserve the better outgoing path and then refine the first correction. Looking farther ahead gives the steering input a destination beyond avoiding one bumper at the final moment.
A close-pass attempt spends a shield
You move unusually near a vehicle to chase a near-miss reward while another car is approaching in the next gap. The line is not settled enough to maintain that small separation, and the collision interrupts the run. Return to selecting a clean gap with room around the car. Keep the next traffic group visible and make the pass repeatable before investigating optional close-pass rewards on a more familiar stretch.
Compare remaining shields and the ease of the outgoing line. A clean passage that preserves movement can support more total distance than a risky reward attempt which forces a recovery. Use a naturally close passage as an observation, not a requirement for every overtake. The broader objective is a useful timed run, and preserved protection gives you more opportunities to build one.
A crowded group feels too fast to understand
Several traffic cars reach the near part of the scene in quick succession. You alternate directions because each immediate gap seems to disappear before you can choose the path beyond it. Begin braking earlier and watch the group while it is still farther ahead. Select the outgoing lane first, then make one measured steering decision. Keep the difficulty and viewing setup consistent for the comparison.
Notice whether the traffic remains readable long enough to prepare the pass. The useful evidence is a calmer decision process with less unnecessary direction switching, not a promise that every group has the same opening. Once that approach is understandable, regain pace on the following open stretch. Do not use more steering strength to compensate for arriving at every group without enough time to read it.
Boost closes the next gap before it is prepared
The lane appears open, so you activate a long burst. The next traffic group grows quickly and you keep boosting while trying to choose a new path, turning an easy stretch into a hurried steering problem. Try a shorter burst on the same kind of open section. Release before the next group becomes immediate, then read its outgoing gaps at normal pace. Keep the line familiar rather than adding a new close-pass experiment.
Watch whether the burst produces useful distance while leaving time for the following decision. Reserve spent on an open road has a clearer purpose than reserve spent while the next lane remains undecided. Keep the shorter use if it preserves a manageable transition. Let reserve recover and choose another open stretch later instead of treating continuous boost as the only worthwhile use of the control.
Keep the experiment useful: Controls, recovery and setup
Before trying the exercise, confirm the current mission in Velocity Coast: Cover the greatest distance before the difficulty-adjusted timer expires while protecting your three shields. The player’s controls table is the reference for the actual actions available. A / D or ← / → means steer smoothly left or right. W or ↑ means accelerate. S or ↓ means brake. Start and focus the canvas before using the keyboard. On a phone, use the labelled touch actions under the scene. Change one input at a time while learning the response; unfamiliar finger placement can otherwise look like an unexplained change in the game’s handling.
Difficulty and Graphics answer different questions. Low creates a calmer learning condition by changing the relevant mission settings; Medium removes some assistance; High uses the base challenge. Changing difficulty begins a fresh run, so choose it before comparing attempts. Graphics changes the rendered scene: Low reduces resolution and disables sunlight shadows, Medium adds shadows, and High increases sharpness, shadow detail and material reflections. A clearer picture can help you read the scene, but it does not replace the movement decision described in this article. Keep difficulty fixed while testing a technique.
Three lives give a run room to continue after detected failure. Read the reason on the Continue panel and choose one correction before recovering. Continue restores a safe position while completed mission objectives remain where the mode supports them. Reset vehicle can recover an awkward position without refreshing the page or spending a life. Recovery does not mean a completely fresh mission: choose Start a new run when you want the original opening. A paused panel stops the active simulation, and a voluntary reset adds no time penalty.
Use the pause control if you need to read, change hand position or look away. Sound and background music have separate controls and begin after an interaction; they are optional feedback rather than prerequisites for understanding the visible target. Fullscreen gives the scene more room, with an expanded-player fallback where the native API is unavailable. If your experiment is about steering or timing, keep the browser, input arrangement and graphics profile consistent. A score from one isolated attempt tells you less than a decision that leaves the vehicle well positioned in several attempts.
Decisions at a glance
| Situation | Useful action | Evidence to watch |
|---|---|---|
| The first opening leads into another blocked lane | On the next approach, read the traffic pair beyond the immediate obstacle. Choose a gap that leaves an outgoing lane, even if the nearest opening appears more convenient. Keep boost out of the comparison. | Watch the room available after the first pass. A useful choice should reduce the urgency of the next decision instead of simply moving the nearest obstacle behind the camera. |
| A close-pass attempt spends a shield | Return to selecting a clean gap with room around the car. Keep the next traffic group visible and make the pass repeatable before investigating optional close-pass rewards on a more familiar stretch. | Compare remaining shields and the ease of the outgoing line. A clean passage that preserves movement can support more total distance than a risky reward attempt which forces a recovery. |
| A crowded group feels too fast to understand | Begin braking earlier and watch the group while it is still farther ahead. Select the outgoing lane first, then make one measured steering decision. Keep the difficulty and viewing setup consistent for the comparison. | Notice whether the traffic remains readable long enough to prepare the pass. The useful evidence is a calmer decision process with less unnecessary direction switching, not a promise that every group has the same opening. |
| Boost closes the next gap before it is prepared | Try a shorter burst on the same kind of open section. Release before the next group becomes immediate, then read its outgoing gaps at normal pace. Keep the line familiar rather than adding a new close-pass experiment. | Watch whether the burst produces useful distance while leaving time for the following decision. Reserve spent on an open road has a clearer purpose than reserve spent while the next lane remains undecided. |
YOUR NEXT SESSION
Put it into practice
In the next coastal run, look at the traffic group beyond the nearest vehicle before choosing a pass. Name the lane you want after the first gap, reduce speed early if the group is crowded and make one clean steering movement. Keep boost and close-pass chasing out of the first comparison. On a later open stretch, test a short boost that ends before the next group becomes urgent. Compare shield preservation, outgoing room and total uninterrupted movement. Keep the decision that makes the following traffic choice easier to read.
Play Velocity CoastFrequently asked questions
Should I aim for a near miss on every pass?+
No. Build a clean, repeatable traffic line first. A naturally close passage can add a reward, but forcing one while the next gap is unclear risks shields and uninterrupted movement. The broader goal is useful distance during the run, not an isolated risky bonus.
Why brake if the objective is distance?+
Earlier braking can create time to read a crowded group and preserve protection. A collision also interrupts movement, so the quickest immediate approach is not always the best route through the whole timer. Regain pace on a prepared open stretch after choosing the outgoing lane.
When does boost help most?+
Use it when the current line and the space beyond it remain open. Try a short burst and release before the next traffic group becomes urgent. Compare the resulting transition rather than assuming that using every available reserve always creates the strongest run.
Final words
A clean highway line solves the next gap as well as the nearest one. Read farther ahead, slow before uncertainty becomes urgent and use boost on a prepared exit. Near-miss rewards are optional; a manageable route is the foundation of a longer run.
Choose one idea from this article, try it in your next run, and notice what changes. A calmer, repeatable attempt gives you something useful to build on.