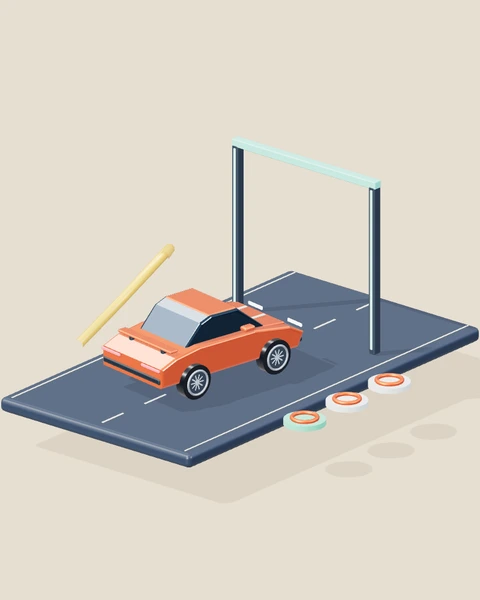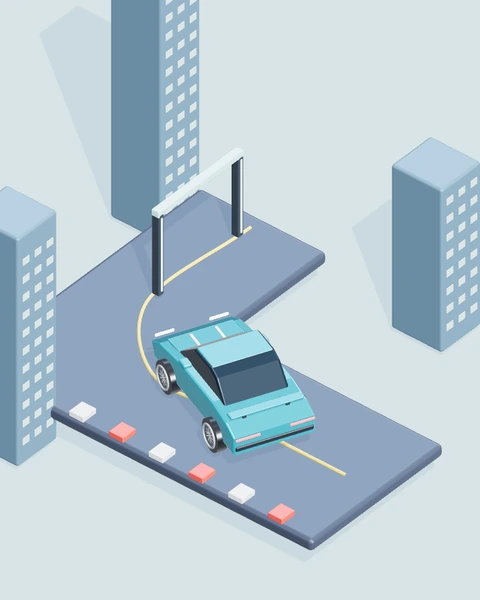
Pursuit Breakout is not a simple race to the first visible exit. Three access beacons must be collected before the escape point becomes valid, and pursuing vehicles move around solid buildings while you choose your route. A good run therefore combines objective planning with local decisions about space and momentum. The beacons can be taken in any order, so the route is yours to organise. This article explains how to keep the full mission in mind while responding to nearby rivals, when boost is useful and how three-life recovery lets a failed escape become a more deliberate next attempt.
Unlock before escaping: Read the mission as a sequence
The exit has a prerequisite: all three beacons must be collected. Reaching its position early does not finish the run. This makes the objective different from simply driving to a corner of the map as quickly as possible.
Begin by locating the beacons and the exit, then choose an initial order you can remember. That order is not a required fixed route; it is a plan to prevent repeated improvisation from hiding missed objectives. As you collect access, keep track of what remains. A nearby pursuer may require a temporary detour, but the detour should still lead toward an uncollected beacon or the unlocked exit. Route awareness turns movement into progress instead of a long chase that forgets why the car is travelling.
Buildings change the route: Use visible space rather than a straight-line wish
The city has solid buildings that affect both vehicle movement and pursuit routing. A beacon may be visible beyond a block without a direct path through it. Driving toward its screen position without reading the available road can lead to a contact or an awkward stop.
Look for the opening around the block before applying a strong turn or boost. A route that appears slightly longer can be more useful if it leaves a clear direction change and enough space to maintain control. Notice where the next open area begins and whether your approach will reach it aligned. The map’s obstacles are part of the decision, not background scenery to be ignored while following a straight imaginary line toward the objective.
Read nearby pursuers: Avoid a last-moment reversal
Pursuit vehicles move toward the player and route around the city blocks. Their current position matters, but so does the direction in which they are closing. Waiting until a rival is immediately in front of the car can leave you attempting a harsh direction change or a reverse manoeuvre with little space.
Look ahead for the route that preserves useful room. If a rival threatens an opening, choose a visible alternative before entering the narrowest part. You do not need to keep every enemy on screen continuously; you need enough awareness to avoid repeatedly driving into a contact you could already see developing. Use a calmer difficulty to observe those approaches, then make the next route choice early enough that stable vehicle handling can support it.
Boost serves an opening: Speed needs a usable direction
Boost is useful when the car is aligned with a clear escape line. It can create room from pursuers or move you through a prepared straight section more decisively. Applied while the next turn is unresolved, it can instead reduce the time available to read buildings and rivals.
Choose the route and settle the heading before spending boost. Compare one unboosted passage with a brief boosted passage through the same clear opening. Watch whether the extra movement leaves more usable space afterward or creates a rushed corner. The boost indicator also gives you information about what remains available. Treat it as a tool for a chosen section, not a command that should be held whenever a pursuer exists anywhere in the city.
Shields and lives: Recover the escape without forgetting access
Shields absorb pursuit damage, while lives govern further attempts after a detected failure. When shields are depleted, the Continue flow restores them and returns the car to a safe position. Completed access remains part of the current run, so recovery should not become a confusing repeat of an already collected objective.
Use the recovery moment to reconsider the route that led to the contact. You may need an earlier turn, a clearer opening or a calmer approach to the next beacon. Brief immunity after recovery gives space to resume without an immediate repeated impact. It is not a reason to drive deliberately into the same obstacle. After the final life, begin a fresh run with the route correction you have chosen rather than refreshing the page to escape a stuck state.
The final exit needs a plan: Finish the route you actually unlocked
After the third beacon, the mission changes. Another uncollected objective is no longer the next destination; the unlocked exit is. Continuing to circle through earlier beacon positions can spend time and shields without adding progress.
As the last beacon becomes likely, think about the route from it to the escape point. You may prefer an order that makes that final transition easier, provided the earlier collection remains manageable. This is where a complete route plan can be more useful than choosing only the nearest next marker. Keep the end of the mission visible in your decisions, then adapt locally when pursuing cars change which opening is safe. Successful escape connects the prerequisite and the final position.
Choose your pace: Difficulty and recovery
Start Pursuit Breakout on Low while you learn its objective: Collect three access beacons, evade the pursuit cars and reach the unlocked exit. Low is the default in this edition. For the new physical challenges it gives a larger time allowance and calmer handling; applicable courses also have wider landing surfaces or slower moving hazards. Medium sits between that assistance and the High challenge. The setting changes gameplay, while Graphics controls drawing quality. Keeping those decisions separate helps you answer the right question: is the task unfamiliar, or is the device struggling to draw it smoothly?
Each run begins with three lives. A detected failure uses one life and offers Continue from a safe checkpoint. The new vehicle challenges preserve completed objectives within the run; cargo recovery reloads the boxes, pursuit recovery restores shields, and bike recovery returns to a supported part of the course. After the last life, Play again starts a fresh run without reloading the page. Reset vehicle is also available for an awkward position. A voluntary reset does not need to become a repeated page refresh.
Changing difficulty starts a fresh run, because the layout and timing need to agree with the chosen setting. Your saved preference belongs to this browser and this game. Treat a comparison between Low and High as two different practice conditions, rather than evidence that the same score means the same performance. For a fair experiment, keep the difficulty, control method and starting checkpoint consistent. Increase the challenge after you can explain the action that reliably worked, instead of using a harder setting to compensate for a technique you have not yet understood.
Opening order: Give the route a memory
The three beacons can be collected in any order, while the exit remains invalid until the full access set is complete. Choose an initial order before accelerating. Use the first run to see whether its building passages and final exit transition are easy to follow.
Notice which part creates confusion or a rushed turn. A route can fail through poor sequencing even when each individual beacon is reachable. Keep the manageable sections and change the troublesome transition. The next plan should answer a visible route problem rather than begin at random.
Blocked line: Find the opening
A beacon lies beyond a solid block, and a direct visual approach can carry the car into the building rather than around it. Slow enough to inspect the available side passage, align with it and choose the turn before applying stronger movement.
Observe whether the new line leaves a clear exit from the block. A contact avoided early preserves both shields and a usable heading. Use the visible road as your guide. The marker’s position tells you the destination, but it does not remove obstacles between the car and that destination.
Closing rival: Decide before contact
A pursuer is moving toward an opening you intended to use. A late reversal can leave both speed and route direction unresolved. Choose an available detour while there is still space. Keep the next beacon in mind so the avoidance remains connected to mission progress.
Watch whether the rival’s approach becomes less immediate and whether your car reaches the new passage aligned rather than wedged. Keep the earlier decision if it creates room. Repeatedly surviving last-second contact is less useful than choosing a manageable path before it develops.
Clear straight: Spend boost deliberately
An open passage offers a prepared line where added movement may create a useful gap without forcing an immediate sharp turn. Align first, apply a brief boost and read the next corner before committing to another burst. Keep the comparison section consistent.
Observe the space gained and the quality of the following turn. A quicker straight can still be unhelpful if it produces a confused exit. Use boost where the route supports it. Keep enough attention for the next direction change rather than treating the straight as the whole mission.
Access complete: Change the destination
The third beacon completes the prerequisite. Previous collection positions no longer explain where the car should travel next. Look for the unlocked exit and choose the route from the current position, taking nearby pursuers and solid blocks into account.
Check the access indicator before expecting completion at the exit. An early visit and an unlocked visit are different mission states. Plan that final transition in future runs. A good beacon order can help the finish when it is chosen with the escape point in mind.
Decisions at a glance
| Situation | First decision | What to observe |
|---|---|---|
| Opening order · Give the route a memory | Choose an initial order before accelerating. Use the first run to see whether its building passages and final exit transition are easy to follow. | Notice which part creates confusion or a rushed turn. A route can fail through poor sequencing even when each individual beacon is reachable. |
| Blocked line · Find the opening | Slow enough to inspect the available side passage, align with it and choose the turn before applying stronger movement. | Observe whether the new line leaves a clear exit from the block. A contact avoided early preserves both shields and a usable heading. |
| Closing rival · Decide before contact | Choose an available detour while there is still space. Keep the next beacon in mind so the avoidance remains connected to mission progress. | Watch whether the rival’s approach becomes less immediate and whether your car reaches the new passage aligned rather than wedged. |
| Clear straight · Spend boost deliberately | Align first, apply a brief boost and read the next corner before committing to another burst. Keep the comparison section consistent. | Observe the space gained and the quality of the following turn. A quicker straight can still be unhelpful if it produces a confused exit. |
| Access complete · Change the destination | Look for the unlocked exit and choose the route from the current position, taking nearby pursuers and solid blocks into account. | Check the access indicator before expecting completion at the exit. An early visit and an unlocked visit are different mission states. |
YOUR NEXT SESSION
Put it into practice
Choose one beacon order and drive it on Low with boost reserved for a clearly aligned passage. Note the first transition that forces an awkward last-second decision. On the next attempt, change that transition while keeping the rest of the route familiar. After collecting the final beacon, deliberately switch attention to the exit. If shields fail, Continue and use the restored attempt to test the chosen correction without forgetting which access objectives are already complete.
Play Pursuit BreakoutFrequently asked questions
Which game should I use for this practice?+
Use Pursuit Breakout first: Collect three access beacons, evade the pursuit cars and reach the unlocked exit. The article's examples are organised around its actual objective, rather than a generic racing score. Start with one exercise and a consistent difficulty, then try a related game when you can explain what changes between the two tasks.
Can I practise on a phone?+
The player provides touch controls beneath the scene, including the action buttons needed by Pursuit Breakout. Use two comfortable fingers when actions must overlap. A keyboard offers a different physical arrangement, so allow a few attempts to learn the mobile timing instead of expecting identical finger movements. Keep the browser controls out of the way with fullscreen when that is more comfortable.
What should I do after a failure?+
Use Continue while lives remain. Read the visible reason first, because a missed landing, lost cargo or depleted shields asks for a different correction. After three lives, start a fresh run with Play again. Reset vehicle can recover an awkward position without refreshing the entire page. The browser retains preferences and available local records when storage is allowed.
Does the exercise promise a particular result?+
No. These are repeatable practice comparisons, not a guaranteed score or a real-world driving qualification. Timing, starting position and control method affect the result. Look for a reliable change in your decisions before treating a single good attempt as mastery. The game guide remains the place to check the complete mission rules and controls.
Final words
Escape is a connected route, not a series of unrelated evasions. Collect the prerequisite, read solid blocks, decide before contact and use boost on a prepared line. Shields and three lives give room to recover, while retained access keeps the next attempt focused on the part of the route that actually needs improvement.
Choose one idea from this article, try it in your next run, and notice what changes. A calmer, repeatable attempt gives you something useful to build on.